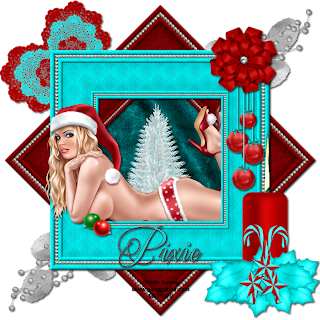
This tutorial was written on October 26, 2010 and is of my own imagination. Any resemblance to any other tutorial is pure coincidence. Please do not use the same images/tubes that I have unless you hold the appropriate license to do so.
Supplies needed:
Tube of choice. I am using the sexy artwork of Keith Garvey. To see more of his work then please stop by My PSP Tubes.
Totally Tiffany scrapkit by ~ Kissed by Pixie which can be purchased here. Thank you so much for allowing me to use this great kit Pixie!!! Much Love!!!!
Eye Candy Nature Fire
Font of choice. I used Mea Culpa
Ok ... let's get rockin!!!!
Open a 700x700 blank canvas and floodfill with white. We can resize later.
Open KBP_TTC_PaperFrame4. Paste as a new layer on your blank canvas. Rotate 45 degrees right or left.
Open KBP_TTC_PaperFrame3. Paste as a new layer. Duplicate. We'll come back to this layer in a moment.
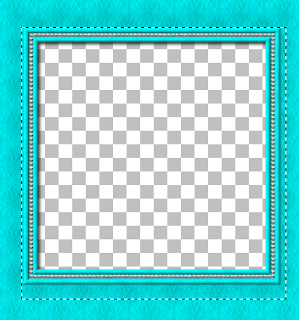
Grab your selection tool and make a selection around your top PaperFrame3 like so:
Selections/Invert
Open a paper of choice. I used KBP_TTC_Paper3. Paste as a new layer. Hit the delete key on your keyboard.
Open another paper of choice, I used KBP_TTC_Paper2 and paste as a new layer. Hit the delete key on your keyboard. Change the Blend Mode to Luminance.
Open your tube of choice. Paste as a new layer and move in between the two PaperFrame3 layers.
Using your eraser tool remove any portions of the top frame layer that you want in order to expose any parts of your tube layer that you want.
Open a tree of choice. I used KBP_TTC_Tree2. Paste as a new layer and resize by 70 twice. Move this layer down below your first (lower) PaperFrame3.
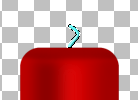
Open the candle and paste as a new layer. Resize as needed and move to the lower right hand corner of the frame. With your freehand selection tool carefully make a selection around the wick like so:
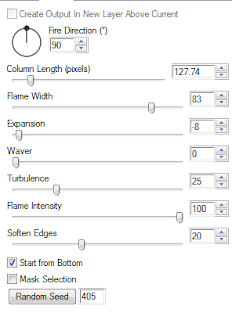
Apply Eye Candy Nature Fire with these settings:
Open KBP_TTC_SilverSpray and paste as new layer. Resize if you like. Rotate to the right 45 degrees and move to the upper right hand corner of the frame. Move this layer to the bottom of your layer palette.
(See my tag as a reference) Duplicate/Mirror/Flip
Open KBP_TTC_LaceHeart3 and Open KBP_TTC_LaceHeart2. Paste LaceHeart3 as a new layer and then paste LaceHeart2 as a new layer. Resize LaceHeart2 by 80%. Paste LaceHeart3 as another layer and resize by 50%. (Can resize as you like if they are still too large) Merge the three layers together. Rotate to the left 45 degrees and move to the top left corner of your frame. Move this layer to the bottom of your layer palette.
Open a doodle of choice. I used KBP_TTC_Doodads1. Paste as a new layer and move to the top right corner of your canvas. Duplicate/Mirror/Flip. Move these layers to the bottom of your layer palette. See my tag as a reference.
Open a DangleBulb of choice. I used KBP_TTC_DangleBulbs2. Paste as a new layer. Resize as needed. Move to the upper right of your frame. See my tag as a reference.
Open a bow of choice. I used KBP_TTC_GiftBow3. Paste as a new layer. Resize as needed. Move to the top right of your frame. See my tag as a reference.
Add your copyright/license information in a clear and legible font.
Pick a couple of colors from your tag to set as fore/background. Grab your text and using your fave font add whichever name you'd like. Add a drop shadow to all layers that you'd like.
That's it! Hope you enjoyed doing this tut!!!
Huggz
Nickie








No comments:
Post a Comment